
After years of worrying if we’ll get a destructive storm or not, this year we finally said that it was enough and ordered anti-hail netting. It took a while to get it. Probably due to a lot of storms around us, and the increase in orders, but last Friday it finally arrived and we decided to install it right away.

The best way to install an anti-hail net is to secure it on a strong metal frame. This way the netting can last up to 10 years without much maintenance, but that’s not possible in our garden. Having a forest garden means that every possible flat surface needs a way to be cleaned. Once the autumn starts the garden is full of leaves that cover everything. We need an easy way to clean the netting, and having a fixed netting isn’t an option.
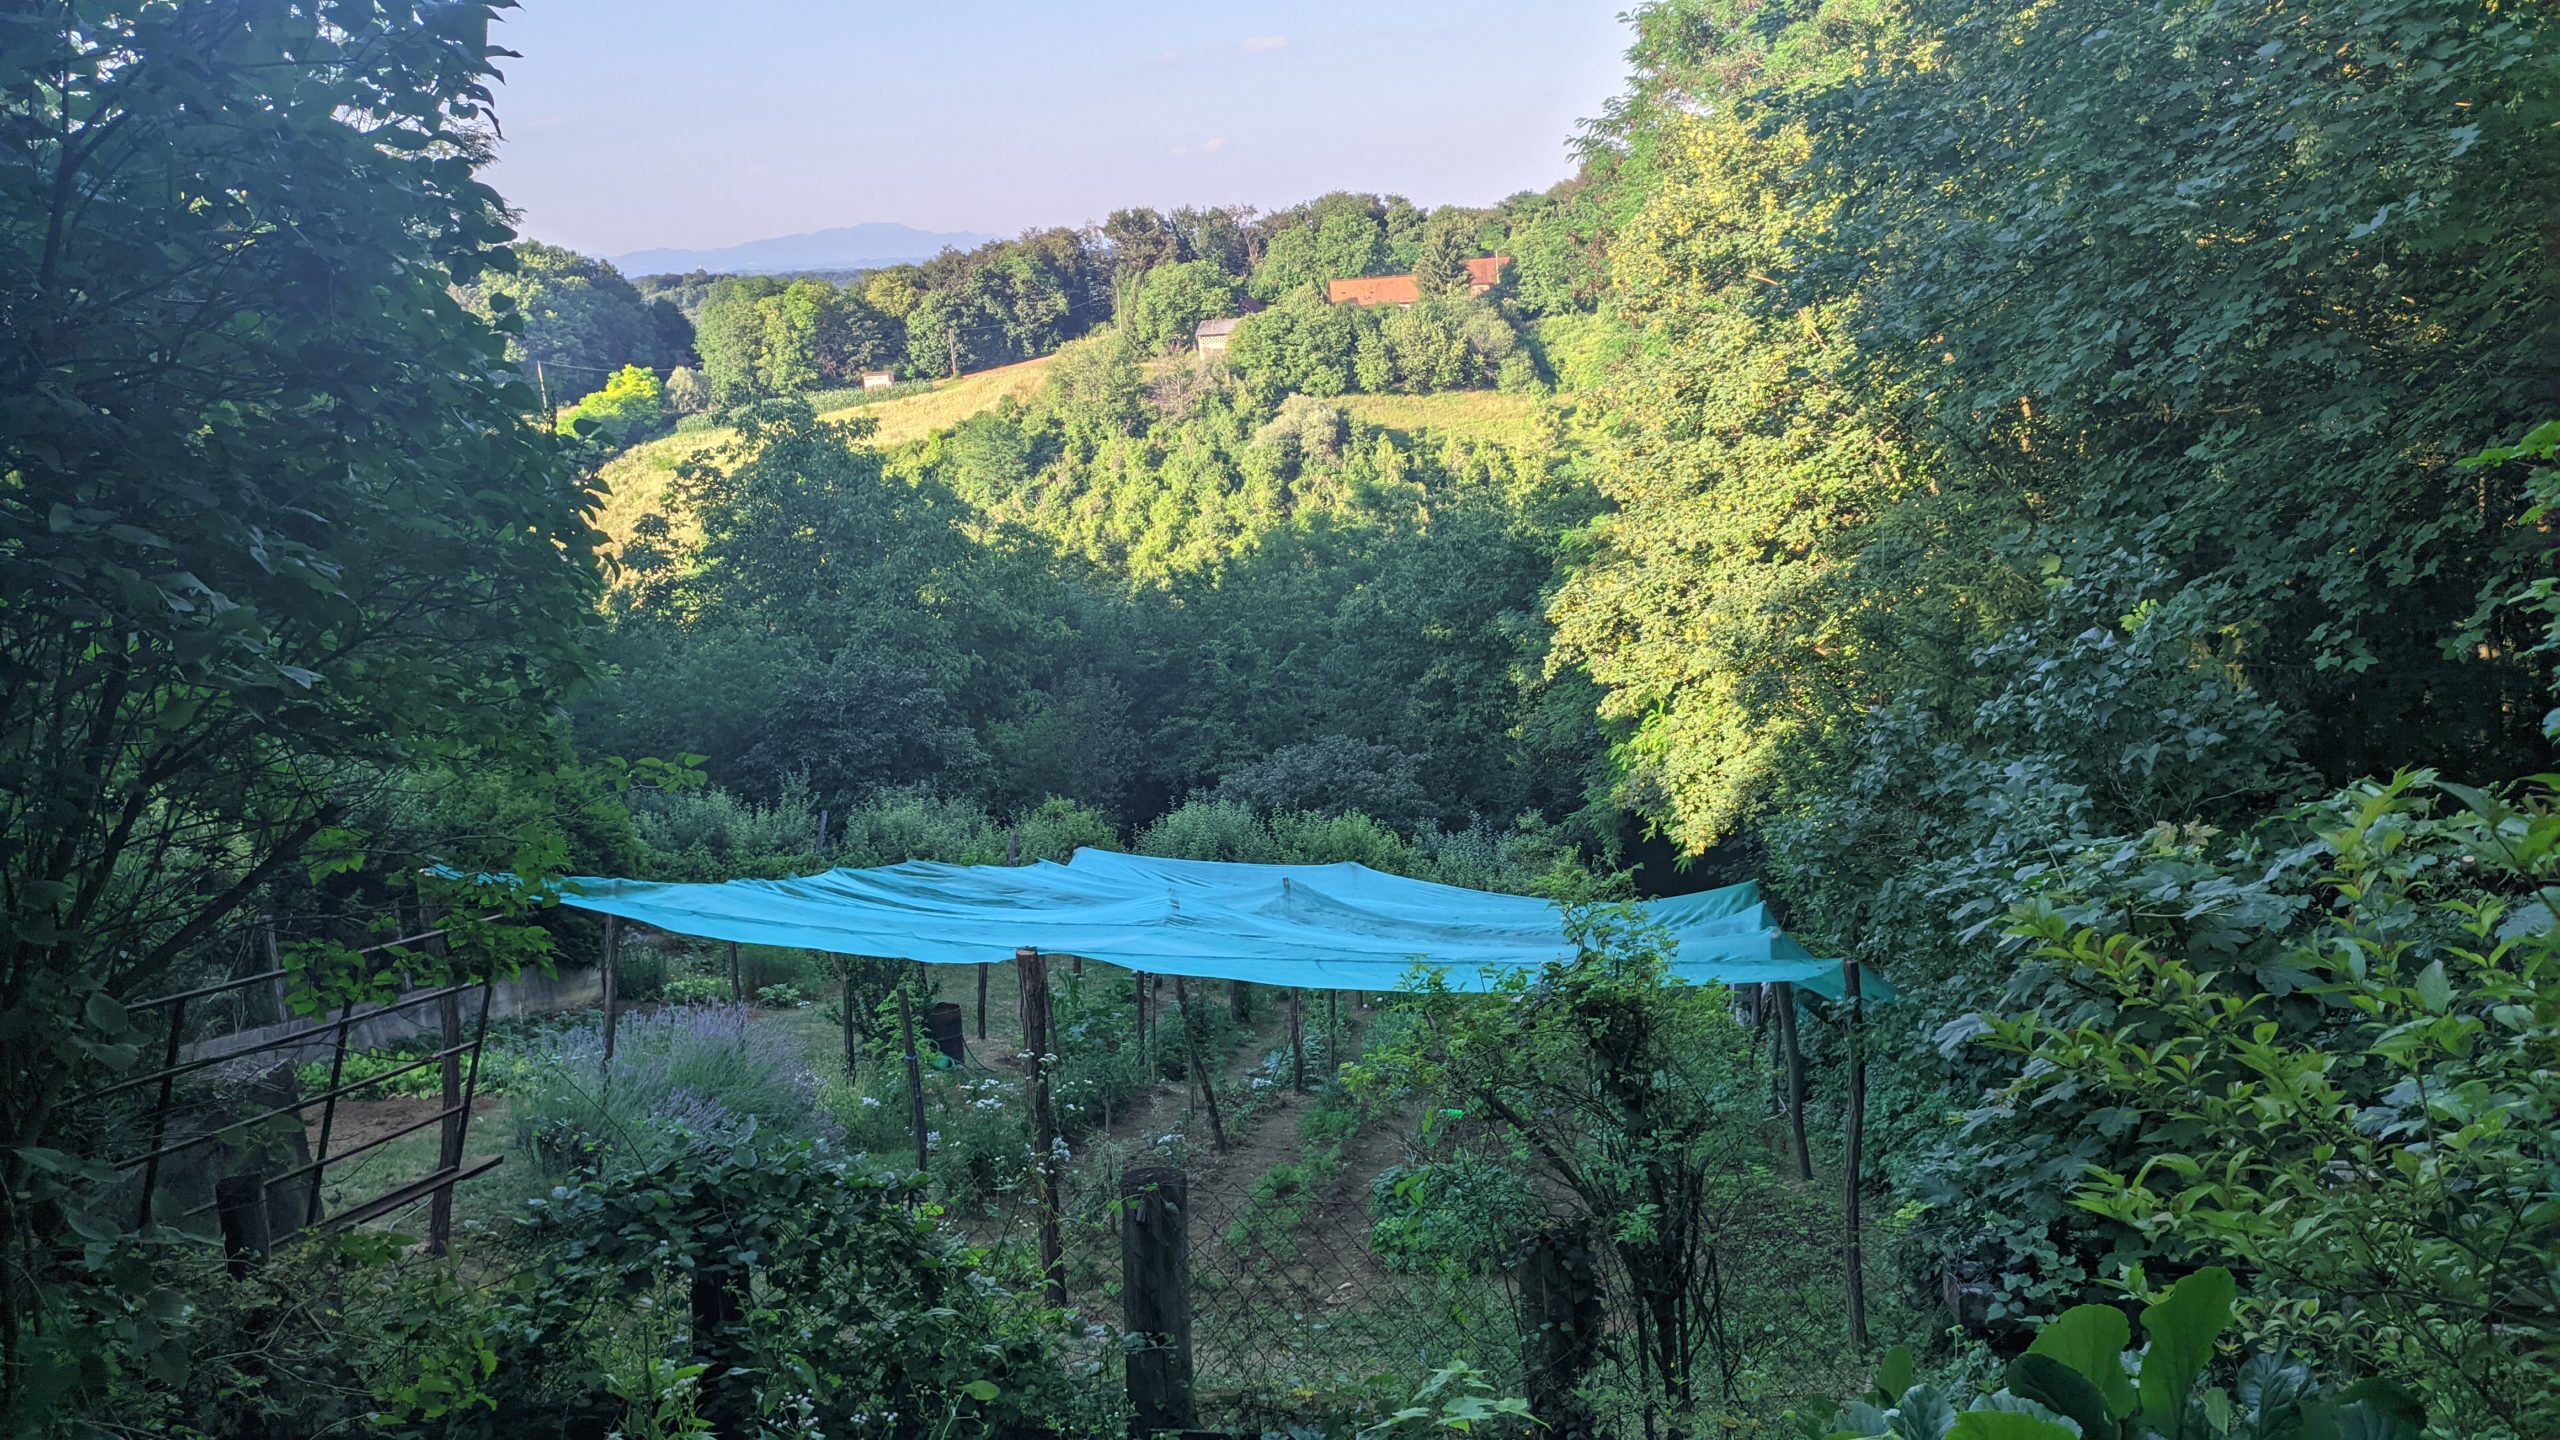
This is why we decided to hang out netting on wooden poles and lots of wires. This way we can roll up the netting and leave it hanging in the middle row. We won’t need to worry about cleaning the leaves. The combination of leaves and snow would just be too much to clean, and half of the time the garden is completely unreachable.
The side garden netting
The side garden netting wasn’t a problem to put on. All we needed was 4 poles and a couple of hours of setting the netting. My hubby hanged it all by himself while I was transplanting the brassica seedlings. The whole side garden area is covered now, including both terraces. We didn’t cover the terraces to protect them from hail. We covered the terraces to protect them from falling cherries and leaves.

The side garden terrace netting is a darker green and from the far, it is barely visible. It’s hanging on the poles and covering half of the north side. This way we protect the veggies from the possible northern horizontal hail.

Main garden netting
Saturday and Sunday were reserved for the main garden netting. The main garden was much harder to install, especially since the whole garden is on a slope and much bigger. The main issue with the sloping garden is that every pole needs to be firmly jammed in a deep hole so that the gravity of the slope wouldn’t tilt it down. Usually, the height of the pole below the ground must be at least 1/3 of the height above the soil. This is the reason why we were forced to place the poles at the height of 2.3m(7.54ft). Any poles higher than that would need to be at least 1m(3.2ft) below the ground, and that’s just something that would be too difficult to dig on our own, especially since we needed 16 poles for the main garden.

We spent our Sunday morning and evening installing the netting. The easiest way to install the net was to tie it to the wires while it was on the arm height and then we lifted it on the poles. We couldn’t fasten it as much as we wanted to but for this year it will be ok.

Plans for more netting
The netting is still not finished. We still need to install the two side nettings, but this will be done in time. For now, the netting will work just fine the way it is. We needed to get the main net up quickly since we have storm warnings published for this week and the garden looks too good this year to let get destroyed.
The garden with the netting doesn’t look much different than before. The heat is still intense, and as I can see bugs and birds don’t care about the netting at all. They are flying around happily, even sitting on the top of the net and chilling in the morning shade.


Next year we’ll probably cover another part of the garden. While hubby was cutting poles our chainsaw broke down, so we had to use only the poles he was able to cut before the failure. Still, all the veggies are now fully covered and we’ll worry about the orchard some other time.


Leave a Reply